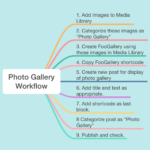
Combining WordPress’s Media Library with the FooGallery plugin allows creation of high quality image galleries that may be displayed anywhere within the site.
Click the thumbnail at right for a summary of the workflow, details of which are below.
1. Add Images to Media Library
- See Standards for appropriate sizes.
- Use “Add New” under Media Library to open upload page.
- Drag and drop images.
- Wait till all images uploaded and processed.
2. Categorize those images as “Photo Gallery”
- Go to main Media Library page. The new images should be at top.
- Select them all (checkboxes on left) and drag them onto “Photo Gallery” category in left sidebar.
- Add captions to each image by going to list view, then unlock by clicking “Edit mode is locked” at top. This is very important since Google downgrades our search position if we don’t fill in the ALT, DESCRIPTION and CAPTION columns on each of our images.
- Then type captions next to each newly added image.
3. Create FooGallery using those images in Media Library
- Open Add New FooGallery (in left sidebar).
- Add the title.
- Click “Add from Media Library”
- Select images followed using checkboxes and then clicking “Add Media” in bottom right.
- On return to FooGallery page, click “Publish” button on right.
4. Copy FooGallery shortcode – click on the shortcode displayed under Gallery Shortcode on the right.
5. Create new post for display of photo gallery – click on Add New Post in left sidebar.
6. Add title and text as appropriate.
7. Add shortcode as last block – add a shortcode block, then paste the shortcode from step 4, above.
8 Categorize post as “PhotoGallery”
9. Publish and check
- View the newly created gallery post.
- Are the images there?
- Do they open to full size?
- Do the navigation buttons work?
- Then go to Photo Gallery page. Does the newly created gallery show there?
